

A guide for setting up your own Git server on your Asustor NAS, using Gogs to make the process easy and painless. This guide was written for Asustor because that's what I use, but it may prove useful for other NAS environments as well. I wrote this mostly so I can reference back to it later if I ever need to reset my own installation or troubleshoot something, but hopefully it's helpful for your own use case as well.
I wanted to host my own Git server and not have to rely on someone else's service, and at the time of writing this I've only used Github before and I've run into some problems a few times with that service (for example, files over 100mb won't upload), and some projects I want to be in full control over (thus, not hosting them online).
And I'm happy to report that for those already familiar with the Github website, everything will feel and behave very similar to what you're already used to!
Pre-requirements:
First, you'll need to open up the Services app in the Asustor dashboard and enable MariaDB and allow remote access to it. Then we'll need to install PHPMyAdmin from the App Central to access the MariaDB database. Once you have it installed, open it (it will open in a new tab/window), and login with the default login credentials that can be found on the PHPMyAdmin app page on the App Central, in the apps description.
Once logged in to PHPMyAdmin, navigate to User accounts, change the password of the root user just to be safe. Then we need to create a new account for Gogs to use. So click on "Add user account". Then set the following attributes (don't mess with the other attributes that aren't mentioned here, these attributes were taken from Gogs app description in the App Central):
- User name: gogs
- Generate a password and save it someplace safe (like a Password Manager), that password should automatically have been added to the password text field.
- Check the box for "Create database with the same name and grant all privileges" (don't allow Gogs access to everything by checking Global privileges, it only needs access to its own database)
That's it, finish creating the user by clicking Go in the bottom right corner.
Installation:
Go on to the App Central and search for Gogs, install it and let it install everything it needs. Then proceed to open the app from the dashboard and you'll be taken to a new tab/window where you need to input some setup information. Input the following:
Database:
- Database type: MySQL
- Host: IP:PORT (the port should match the one you set for MariaDB in Services when enabling it, standard port is 3306, IP should be the same as the ip-address the NAS runs on)
- User: "gogs".
- Password: the one you generated for it while setting up the gogs user and database.
- Database Name: gogs
The rest you should be able to do yourself :)
Once you're done you have yourself your very own self-hosted Git service!
Gogs + Github Desktop
Now that you're up and running, all you have to do is register as a new user on your self-hosted Gogs. Then you can sign in and create your first repository. Once you have your repository you can copy the git link found on the right, above the repository files.
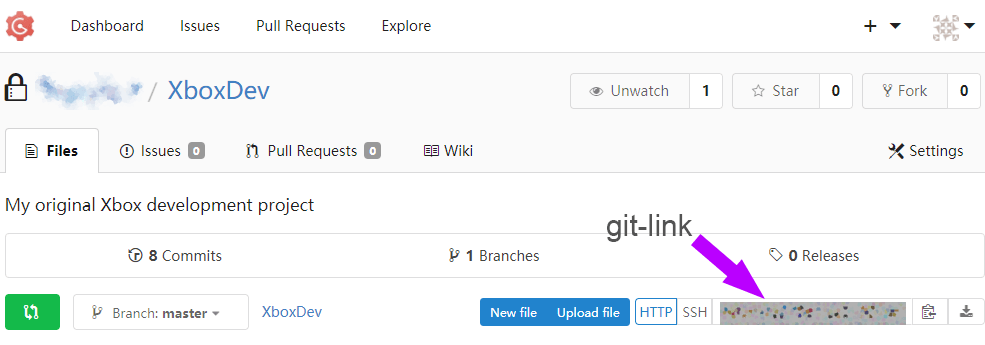
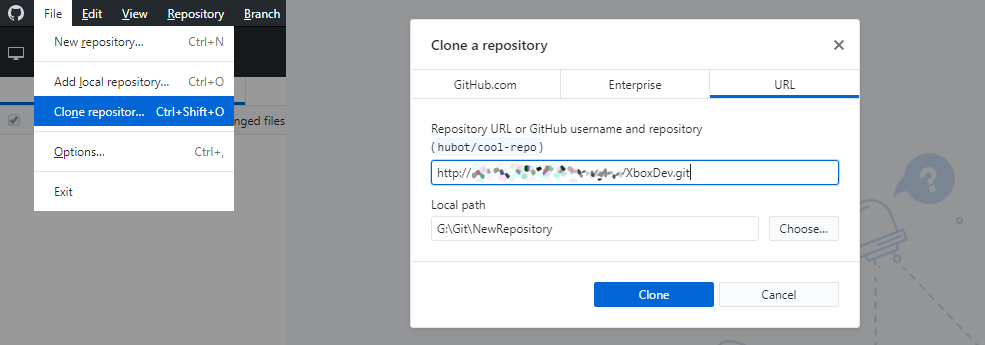
Copy the git link for that repository and open up Github Desktop. In Github Desktop, click on File > Clone Repository, go to the URL tab, input the git link and where you want to store it locally, after that it may ask you to login with your Gogs account if you set the repository to private.
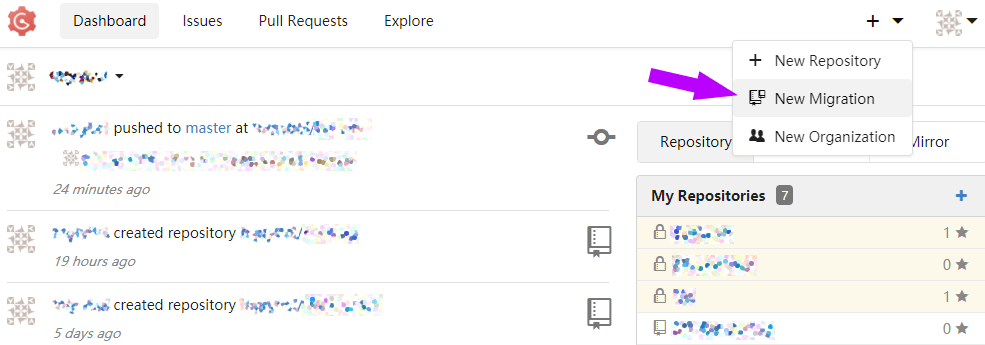
It's also very easy to migrate over git repostitories from other places, like Github, to your self-hosted Gogs service by simply clicking the plus button in the top-right corner, and then "New Migration" and just follow the instructions there.
That's it, happy coding and version controlling! :)